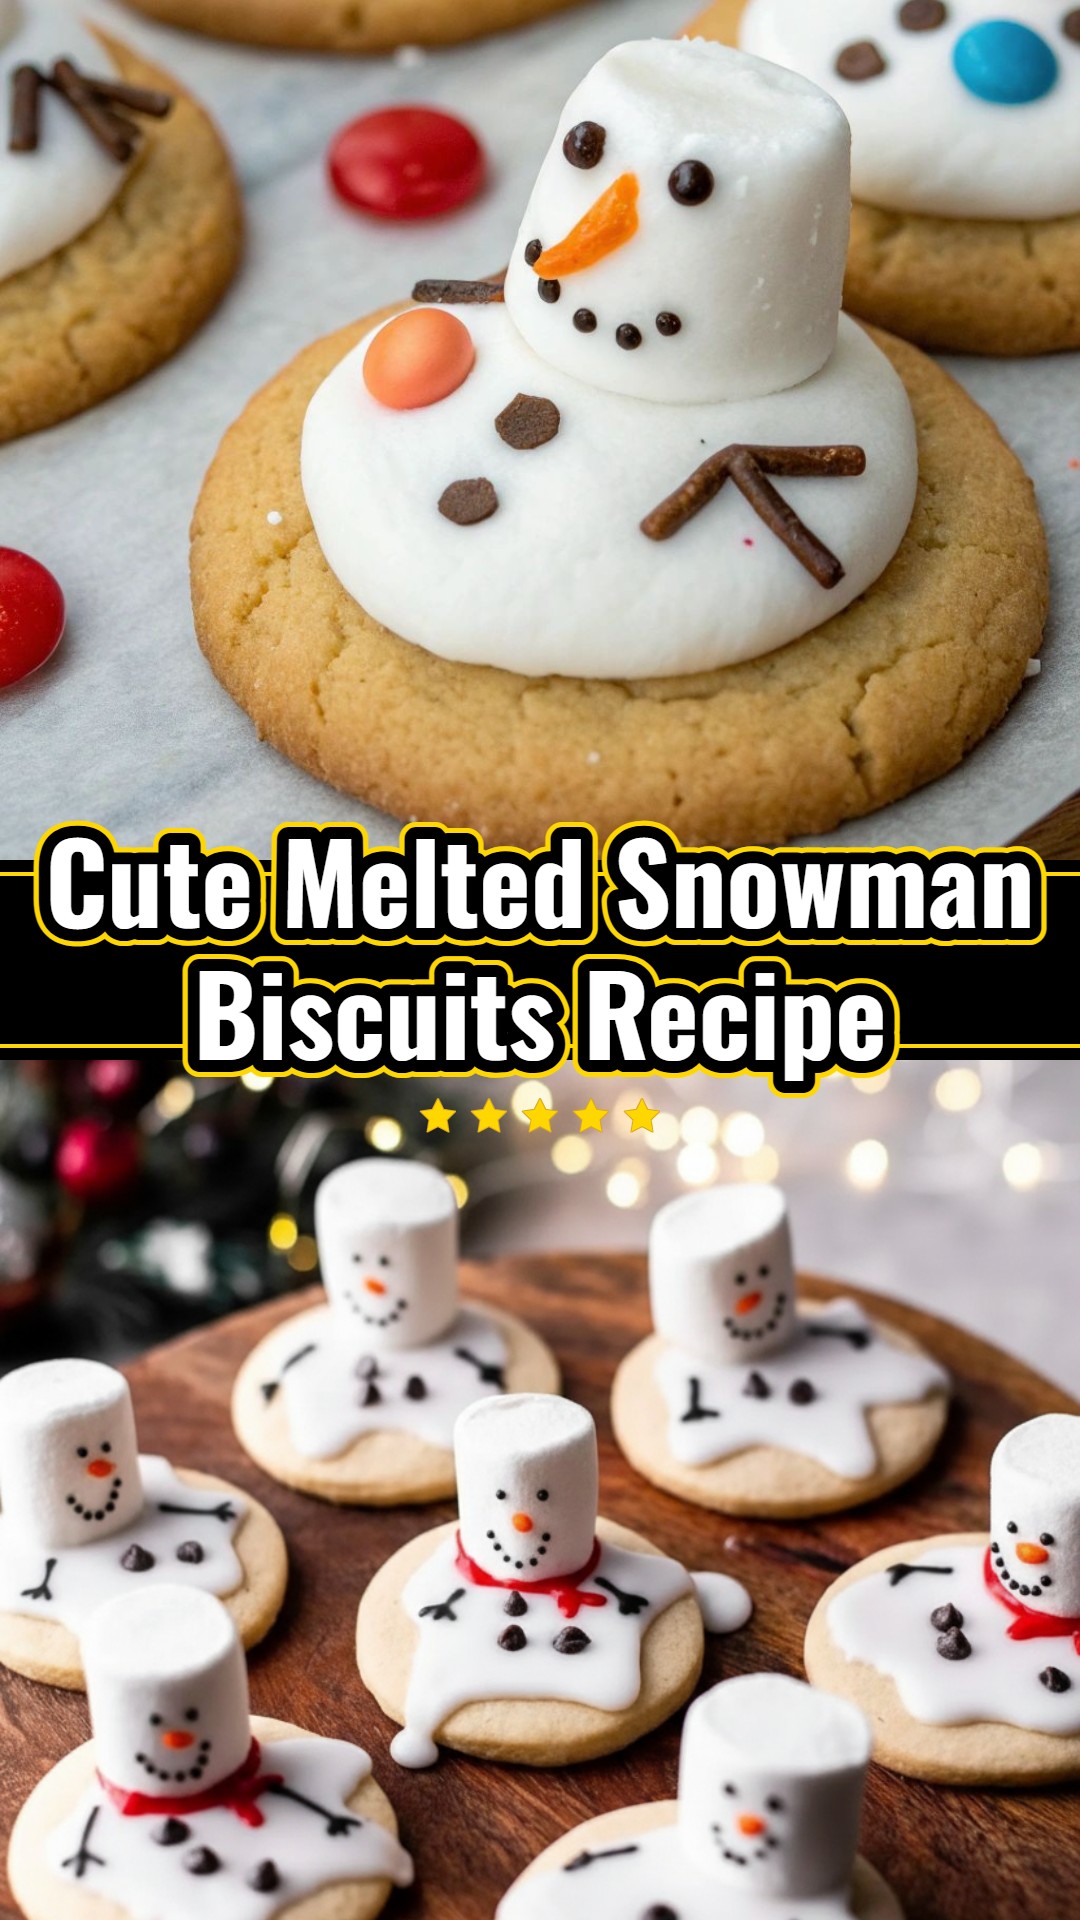
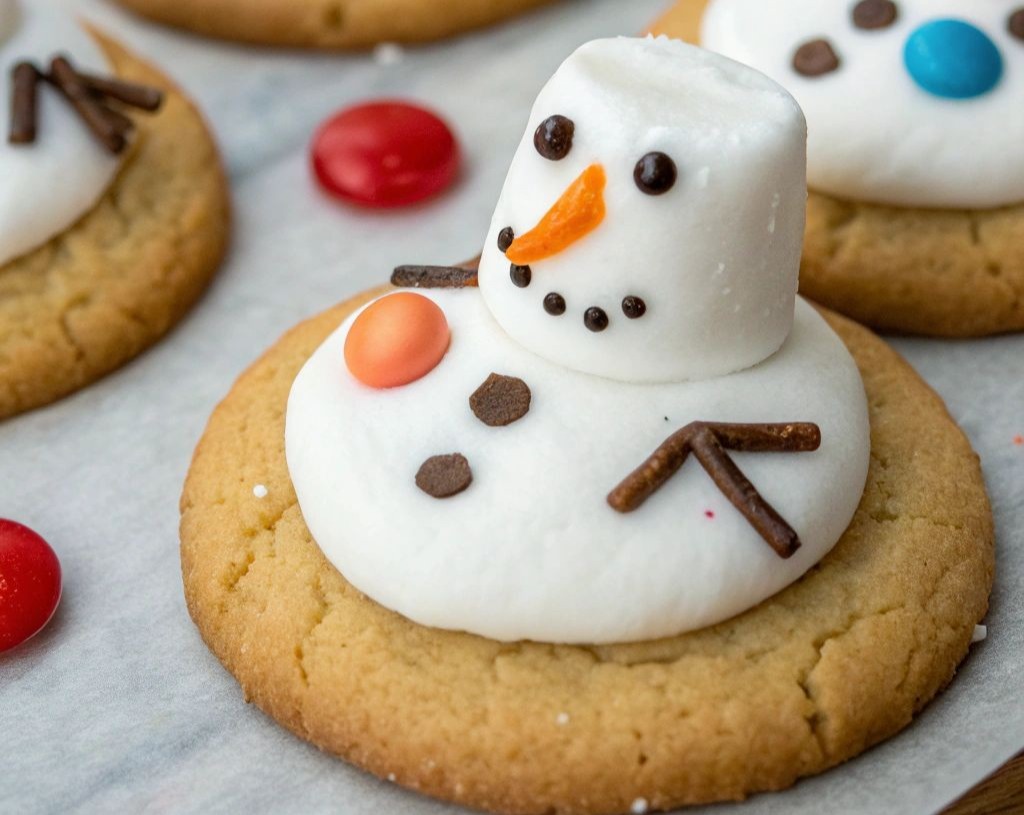
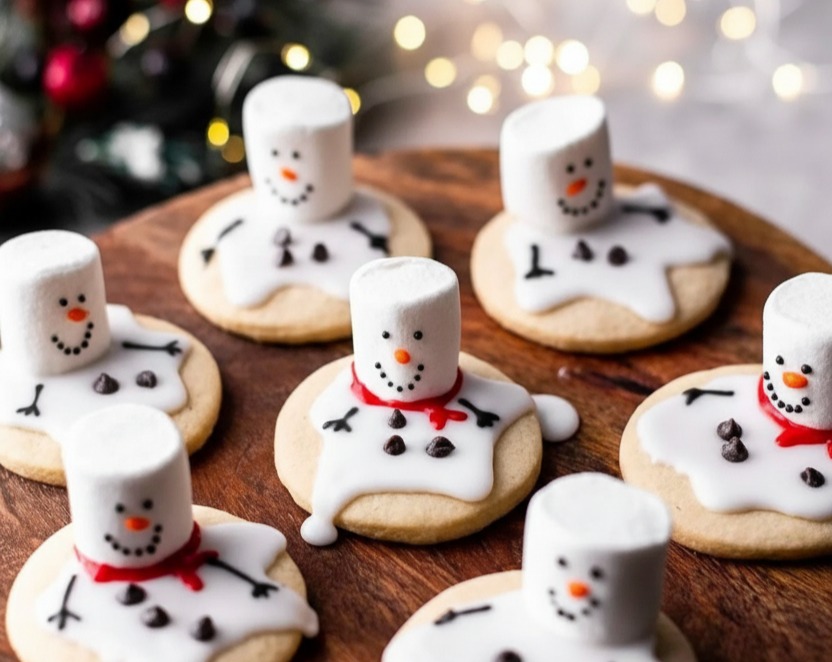
The holiday season is all about creating cherished memories, and what better way to do that than with a recipe that brings pure joy and a touch of whimsy to your kitchen? Imagine the laughter and delight as you gather your loved ones, especially the little ones, to craft these irresistibly charming Melted Snowman Biscuits. This isn’t just about baking; it’s about an experience – a moment to slow down, connect, and sprinkle a little magic into your festive preparations. Forget the stress of overly complicated Christmas cookies; this recipe is designed for simplicity and maximum fun, making it an ideal activity for a cozy afternoon of Christmas cooking or a lively Kids Christmas Party. These endearing treats look like they’ve just taken a playful tumble, bringing smiles to every face. Get ready to create edible art that tastes as good as it looks, proving that the best Christmas goodies are often the easiest to make and the most fun to share.
Helpful Tips
- The foundation of your snowman is crucial! While digestives are great, consider sturdy shortbread cookies for a buttery richness or even gingerbread cookies for a festive, spiced twist. Graham crackers can offer a delightful crunch, especially if you’re aiming for a s’mores-like flavor profile. Ensure your chosen biscuit is flat and robust enough to hold the icing and decorations without breaking.
- Achieving the perfect ‘melted’ look hinges on your icing consistency. Start with the suggested milk amount and add very gradually. You want an icing that’s thick enough to cling to the biscuit and create a distinct ‘puddle’ and ‘head’ shape, but still soft enough to spread easily. If it’s too runny, your snowman will completely disappear; add a teaspoon of powdered sugar. If it’s too stiff, it won’t spread naturally; add a quarter teaspoon of milk. Practice on a small amount if you’re unsure.
- This recipe is a goldmine for cooking with kids! Assign them roles – drawing faces, placing buttons, or arranging pretzel arms. Encourage their creativity and remind them that no two snowmen are alike, especially after a ‘melt’! The charm of these biscuits comes from their handmade, slightly quirky appearance. Don’t strive for perfection; celebrate the unique character each child brings to their snowman.
- Unleash your inner artist! Beyond M&M’s Minis and sprinkles, think outside the box. Thin strips of red fruit leather make fantastic vibrant scarves. Use mini chocolate chips for eyes and buttons, or tiny silver dragees for a sophisticated sparkle. Even small pieces of dried cranberry or chopped candied ginger can add unique texture and color. Consider edible glitter for a truly magical, snowy shimmer on your ‘puddle’.
- Patience is a virtue when waiting for your snowmen to set. For best results and to prevent sticking, allow the biscuits to sit undisturbed at room temperature, ideally on a wire rack for air circulation, for at least an hour, or even a few hours if your icing is particularly thick or humid. Only stack them once the icing is completely dry and firm to the touch. This ensures your beautiful creations remain intact for serving and gifting.
Ingredients
- 12 plain round biscuits (digestive biscuits, shortbread, or sugar cookies work great; store-bought for ease, or homemade)
- 2 cups powdered sugar
- 3-4 tablespoons milk (or water)
…and more!
Easy Melted Snowman Biscuits: Christmas Party Fun with Kids
Bring a touch of whimsical holiday magic to your table with these delightful and simple-to-create melted snowman biscuits, perfect for festive celebrations and family fun.
Ingredients
- 12 plain round biscuits (digestive biscuits, shortbread, or sugar cookies work great; store-bought for ease, or homemade)
- 2 cups powdered sugar
- 3-4 tablespoons milk (or water)
- 1/2 teaspoon vanilla extract (optional)
- Small amount of orange food coloring (or a tiny piece of carrot for the nose)
- Black edible marker or black gel icing for eyes and mouth
- Pretzel sticks for arms
- Small candy pieces for scarves and buttons (e.g., M&M's Minis, sprinkles, fruit leather strips)
Step-by-Step Instructions : . . .
To Complete Step By Step Instructions Please Head On Over To Next Page Or Open button (>)